|
[Home] [Reference 1] [Reference 2]
The Fifth Element Stones
Background The Fifth Element stones you have received were cast from molds created using light polyurethane reproductions provided to the moldmaker. Those copies were cast from molds pulled off screen-used stones. In other words, these stones represent second or third generation castings, depending on how one counts down from the original sculpture. Your four elements are all hand-cast in high-quality dental stone. Each weighs a hefty 2.5 lbs. And although quite sturdy, these pieces should nevertheless be handled gently and with care.
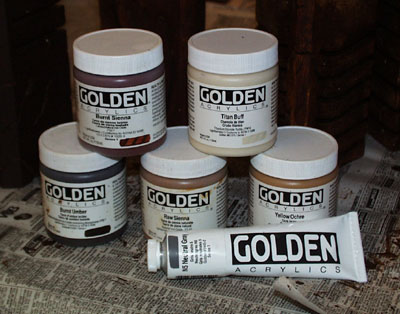
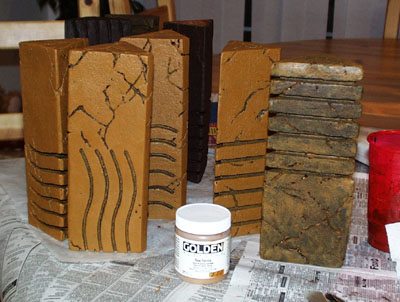
Note: “Golden” brand acrylics are used (see Figure 1), but other brands of acrylics paints should also work fine.
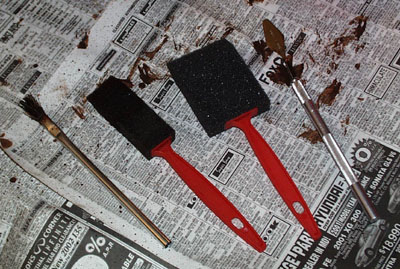
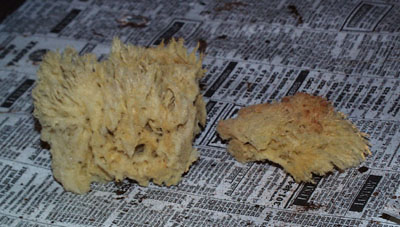
Colors-- 1. Burnt Umber 2. Raw Sienna 3. Yellow Ochre 4. Titan Buff 5. Neutral Gray 6. Burnt Sienna Tools-- 1. Sponge brush (Harbor Freight carries an inexpensive set of these—see Figure 2) 2. Small natural sponge (Michael’s carries the type that I used—see Figure 3) 3. Small 1/2" horsehair brush (Harbor Freight, Grizzly Industrial, and other retailers often carry these in packages of 50 at a very reasonable price—see Figure 2). 4. Small plastic cups (to hold and mix the washes). 5. Artist’s palette or flat surface into which colors can be applied, mixed, and dabbed.
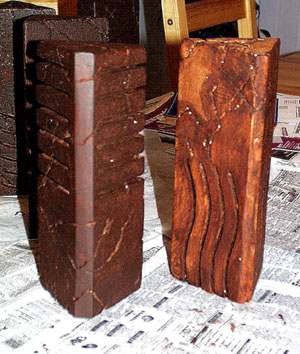
Instructions 1. Paint the entire surface of each stone in un-thinned burnt umber. In the recessed areas, however, a wash (1:1 to 1:2 thinned mix of paint and water) can be used to reach the deep nooks and crannies. The sponge brush can be used as the primary paint applicator. The small horsehair brush is most effective in the deeper design channels on the stone. Cover the entire surface in such a way that the stone looks like a very dark brown block when finished (see figure 4).
2. Apply the raw sienna in the same way: thinned wash in the recesses to guarantee deep coverage, yet still allow the burnt umber to show through very faintly. On the flatter surfaces, paint an un-thinned and thicker coat. Regardless of the way the raw sienna is applied—due to its translucence—it should still allow the underlying burnt umber coating to mildly show, producing a textured or blotchy effect. This is particularly true in the recesses and fissures of the stone. I like to leave those areas somewhat dark—painted with a thinner raw sienna—to give a greater illusion of depth (see figure 5).
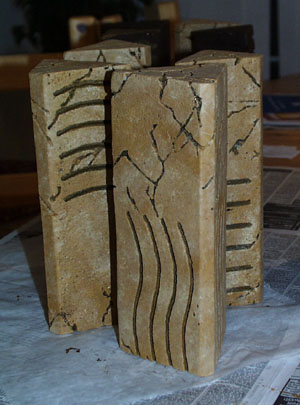
3. Moisten the small natural sponge under lukewarm water and wring it out very well. The device should be moist but not wet. Apply some yellow ochre to your paint palette in un-thinned form. Dab the sponge into the paint. Next gently dab the entire surface of the stone in a random pattern with the paint-loaded sponge. Try to give the surface an irregular look. As the yellow ochre dries, it will appear to blend back into the raw sienna basecoat. Continue to dab the yellow ochre onto the stone until a very soft blotching effect is achieved. Do not try to cover up the raw sienna, however. The raw sienna should remain the predominant color of the stone. 4. Clean the small natural sponge in water to remove all traces of the yellow ochre. Prepare the sponge as described in the previous paragraph in preparation to apply the next layer of color. Mix small amounts of both raw sienna and titan buff in a 1:3 proportion on your paint palette (3 parts raw sienna to 1 part titan buff). The resulting mixture should be relatively light. Take the sponge and lightly dab it into the paint mixture. Next, very lightly dab the combination onto various sections of the stone. You should attempt to create very light veins of white on the stone’s service. The raw sienna/titan buff mixture should be applied very lightly and sparingly. Otherwise, the surface of the stones will become too white. If too much paint is accidentally sponged on, either smear the paint with your finger, or dab it several times with a wet but clean sponge in order to remove some of the extra paint. Make any corrections quickly, as the paint dries fast.
5. Prepare the sponge for a new color by following the procedure outlined in steps 3 and 4 above. Take a small amount of burnt sienna and spread it on your paint palette. As before, use the sponge to sparingly apply the burnt sienna in various places on the stones’ surfaces and attempt to produce a subtle veining effect. The raw sienna is a strong color and should be applied as sparingly as the raw sienna/titan buff mixture described in the paragraph above. 6. Prepare the sponge for a new color by following the procedure outlined in steps 3, 4 and 5 above. Take a small amount of neutral gray and place it on your paint palette. As described in some of the proceeding paragraphs, apply the grey—after dabbing it on the paint applied to the paint palette—very sparingly to the surface of the four stones. The grey should be used to stain small areas of the stones; In order to give the effect that the pieces have been distressed. If applied properly, the grey should almost be imperceptible. Nevertheless, the grey could make the stones appear to have very light grey veining, or stains due to exposure to fire. The effect created will depend upon the amount of grey applied. If you have received a black and white printing of this page, go to the following Internet links to view online color reference photos of the props from which yours were cast: http://www.steinschneider.com/props/fifth_element/fifth_element_stones_01.htm If you have additional questions, feel free to contact Phil Steinschneider at the following email address: Good luck in your endeavor. Once you have finished painting, you should have a very nice set of Fifth Element stones. [Home] [Reference 1] [Reference 2] |